How not to shoot studio portraiture
Mistakes to learn from with studio portraiture
During the recent studio shoot many mistakes and lessons were learned, from depth of field, to lighting and camera settings. After reading this article you should come away with tips that can prevent the same mistakes and help you learn faster. Being honest about your experience will help you grow and improve, what better way of doing this than writing it down and sharing the knowledge.
Mistake 1 – Lighting
Being fortunate the lighting equipment was supplied and set up (soft boxes and continuous lights) by 2 of our experienced members from our photography group. Arriving on set with everything up, so the only requirement was set up your camera and liaise with the models.
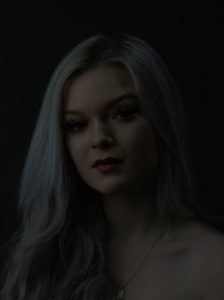
Here was problem one – the shots were dark, so I had to raise the ISO and loose quality.

ISO 400
1/200 second
f1.8 (manual lens)

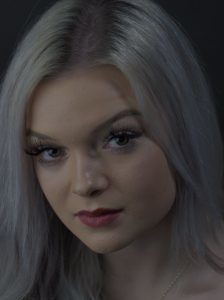
ISO 1000
1/160 second
f1.8 manual lens
From the example photos you will note the differences achieved by adjusting the ISO, but the exposure is out, which happened because of one reason – experience, having never shot under this type of lighting before I didn’t understand what options were available. Only at the very end of the shoot did I realise the lighting was capable of flash too, which made a massive difference to the ISO settings. For examples of this work refer back to post on shooting portraiture here.
Mistake 2 – camera settings
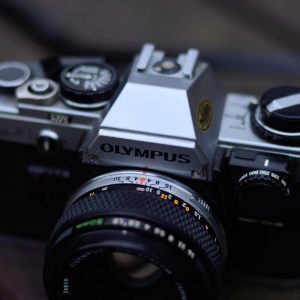
Shooting commenced on my infamous Olympus EM-10, but for lens selection I did not want to use my 14mm prime (too wide) or the 14-42 zoom (too slow). So instead I took a selection of old manual prime lenses from Pentax, Olympus and a couple of Russian numbers.
This is not necessary an issue, manual focus is achievable on objects that are not moving fast, but having the option for wide aperture like f1.8 and f1.7 seemed a suitable choice. However, due to the lack of light (even though the lights were on full and close as possible) it was too dark to focus!!! Normally you can get round this with focus peaking or zooming but even this was not possible, which left me with 3 options:
- adjust aperture
- adjust ISO
- adjust shutter speed
Adjusting to shoot wide open at f1.8 causes bad repercussions for depth of field. This aperture caused too many areas out of focus, so one eye was fine but not the other, my only option would be to move further back, but have less of the model in the frame.
Raising the ISO towards the 1000 region helped the cause, but is not particularly useful to achieve quality,considering you are working with portraiture.
Of course the alternative option is to adjust to a slower shutter speed, which actually only provided a marginal gain and let’s face it hand holding has its limits before you cause blur.
Mistake 3 – camera equipment
Due to a recent purchase of a medium format film camera I wanted to shoot using this beautiful camera, as well as my Olympus OM10 film camera. Both camera’s were prepared with film, the flash triggers work on all 3 of my cameras, the Olympus lenses work on both the EM-10 and the old film, so I would only have to swap these as required.

So excited, all ready, model posing and can you guess what happened – after taking the first exposure the film advance lever kept spinning. There was no option but to abandon the camera, so annoying as they have a great reputation with portraiture shooting!
Although it might be useful to try different cameras and lenses, not having an end product is of no use to your portfolio or the model.
Summary
After looking over this experience, you will understand that preparation was not enough, equipment goes wrong, but you need to understand camera’s limitations and also the environment around you.
- preparation/planning is key
- understand set lighting
- understand camera setting
- use appropriate equipment
- no substitute for practise
Hopefully you will consider these points, think carefully before you go to the shoot and learn from your mistakes, avoiding them is great but we are human after all!
