How to shoot portraiture with a small budget
How to shoot portraiture with a small budget
You see many pictures by professionals and amateurs alike that are so breath taking and inspire you to better yourself. One of the constraints I have felt important to my personal life, is budget. From reading bloggs and books, the press and media you can see the cost of the equipment used by the photographers is astonishing, which doesn’t even include the modelling costs or extra staff.
Take a look at the EXIF data (the digital information stored by your camera regarding your shot and your lens) you can see these pro’s are using very high end Nikon and Canon cameras and you don’t want to look at the pricing of the lenses.
In this post we will consider the equipment used in this particular shoot, the settings which might help you and a look at the results. Hopefully after reading this you will have the confidence to try this type of photography and try something new.
The equipment
Let me be clear, the lighting equipment, the premises or event was not organised by myself but a couple of friends in a photography club I belong to, so I take no credit here, please check out Rob Scatliffe and Jason Good. The main forces behind the event own the lighting equipment due to their experience in the photography industry.
We were lucky enough to have in place different set’s with different backdrops, but each had a simple paper background and 2 softboxes, each with 350w lighting. There was a mixture of flash and continuous lights to suit the mood, with the photos you will see in a minute I wanted to produce an office/professional look, so we setup a few props.
All this lighting equipment is not expensive and I will post links or costs when i have the information to hand. The most important aspect is knowledge, whoever knows more about the equipment should lead, set up the equipment, teach you how to adjust the lighting so you can play. You will learn from watching them on their shots, it’s not a competition, it’s about learning and enjoyment.
When it’s all finished help them take it all down and pack away, even that will help you realise and appreciate what is involved.
The venue
To keep on track with the low budget message, the event was arranged at a local village hall, these are very reasonable in the UK so just pick a suitable time and date and organise around this. Each town and village has something like this and quite often parking is no issue if you pick a weekend, when it’s quite.
You may need to consider telling the model where it is if difficult and know how big the place is, take power extensions and leads with you as they could be sparse with electrical sockets.
The camera
Some of you will think right i am listening now, this is the important bit, but let me tell, that is completely wrong. The section above is far more important and i wonder, are you really interested in what lighting was used or what it cost? The few photos below were all actually taken on:
A KIT LENS
See i have not gone in to detail on purpose, sorry, or should i provide more information? Okay, fair enough, the kit lens cost approx £60, the camera cost £225.
The Settings
I am guessing this is the section you normally read when looking at other people’s photo’s, so you can put this in motion yourself and try. I will be different because like the camera, this is not relevant and depends on your setup, the room, the emotion you want from the shot, the model and the lighting. In a studio environment like this you can shoot manually because nothing is changing without you doing it, you put more light on the subject you can shoot lower iso or shoot with more depth of field.
The model
I was fortunate to have met Safia Rofidi on a night shoot during 2016, where she attended our first group session with mainly ambient light on the streets of Lincoln. She kindly offered her time for a very reasonable fee (especially when you have a number of photographers) and helps her work towards her promising career. Therefore i urge you to ask around friends that maybe attending colleague or university and want a little or experience for their resume, it works both ways and you both get a lovely product and a professional contact at the same time.
Model’s will often have suitable clothing too, so if you are confident and prepared you can ask them what sort of look you want to achieve and let them provide some feedback. They may even have appropriate props to use or customise their clothing (Safia has done this in the past)
The images
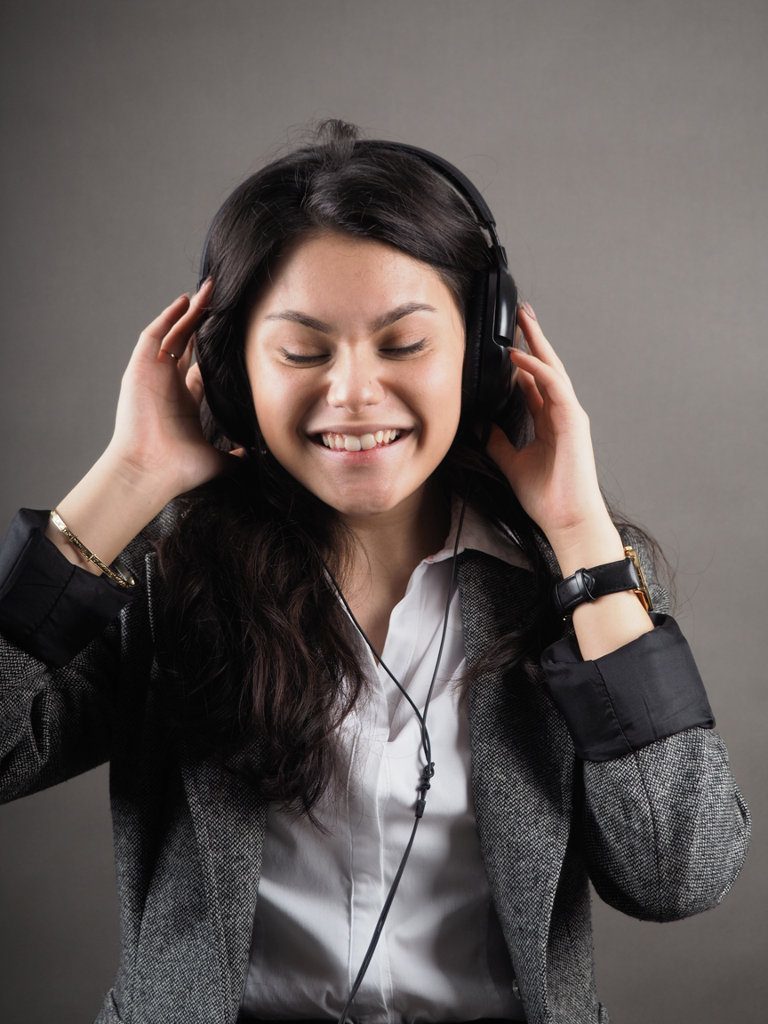
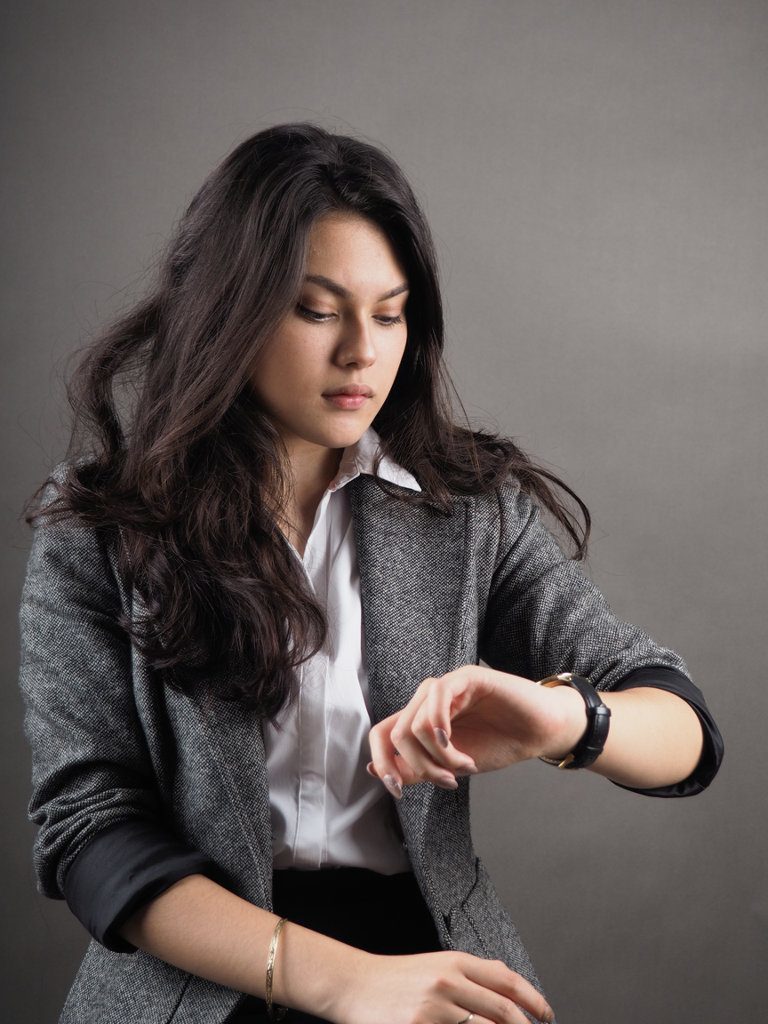
So these images are to portray a relaxed but smart style (headphones) and also a business style. To arrange this I planned this on a piece of paper, a small list of what i wanted and a few small drawings (I draw like a 4 year old) but it was enough to follow. Let me tell you, the structure is very important, you keep more focused and helps your session flow. So take a notebook and pen with you.


Ready for a secret
This is highly classified, so please read carefully, as I want this to sink in to your long term memory, get exercising that cortex now, here goes:
- The images above are not edited, direct from the camera and lowered in size and quality to help the file size
- This was my first studio session ever
So there we go, i cannot state how important those 2 points are, portraiture is well out my comfort zone. I should stress my colleagues in the group set up the lighting and the event so I have them to thank and it is important to be kind to those who have helped you.
I did not want to emphasize this section in a way, as i want the images to stand out, just because I am in-experienced or that I use low-budget equipment should not matter. Is it more difficult on my camera, hell yes, micro 4/3 are fiddly to use due to the small size and sometimes i struggle to see the buttons. But do i miss having a large DSLR, no, honestly, moving away from my Nikon D7000 was the best move I made. I only miss having easy access to buttons like on my old Canon 550d so i can adjust iso, shutter or aperture without looking at my camera. Don’t get me wrong, this is possible on my little camera, but i use these buttons for other functions (keep reading the blog for more information).
Conclusion
Hopefully from looking at the images you can see anything is possible, the very small cost of the camera proves that the technology is not important. To make the most of what you have is more relevant and understand light, use this quality and your artistic side to enhance the shoot.
To help you, let’s summarise with a few points to sort your low budget shot:
- ask a colleague/university student to model
- use a village hall
- arrange a small group of photographers to share the cost
- preparation is key
- technology is not important
- borrow/share lots of lighting equipment
- an experienced photographer on hand
This shoot raised my spirit, my experience of working with models and provided confidence for the next one. So get out your camera, get your friends together, hire a small room and get a model booked!
